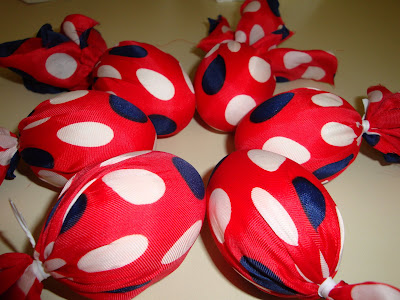
Hubby forwarded me a recipe the other day on how to dye Easter eggs. After reading it, I was totally obsessed by this intriguing idea. It is called Silk dyed eggs. The original link is http://www.ourbestbites.com/2008/03/silk-dyed-eggs.html
What we specially need for this recipe is 100% silk fabrics, preferably old silk ties. The rest are easily available in every household.
The city we live in does not have many thrifty stores. Hubby's silk ties are too good to be chopped up. In the end, I got only one scarf at the Power's farm market, which had no label. From the texture, it felt silky. So I took the chance of using it to try this idea out on Easter day.
The Scarf:

Eggs were wrapped with the "silk scarf":

Another layer of light cloth:

In the pot:

Done:
 Loaded in the basket:
They turned out great for us! We loved the patterns. I figured out the scarf I used is not made of 100% silk since the pattern was not transferred onto the egg shells very concisely. However, the resultant pattern is even better!
I dyed 6 eggs. However, we had only 4 intact ones left 2 minutes after I untied them. Little Audrey excitedly played them, knocked them against each other as she does to her balls, so that 2 of them were cracked :-(.
"My Eggs, more, more"

4 survived the ball-bouncing in the end:

I will collect silk ties through the year and definitely try this again next Easter.


2 comments:
Saw your comment/blog link on Best Bites. Your eggs turned out great! I still need to post pics of ours. My 2-year old did the same thing - knocked 2 of the eggs together and was convinced they were all his!
Thanks for stopping by. Dyeing the egg with silk is such a brilliant idea! I will be looking forward to seeing your Easter eggs.
Post a Comment